CREATE 3D DEM FROM CONTOURS
Creating a 3D DEM Is Easy Using R2V
-
Auto Vectorize your contour/topographic map using R2V.
-
Edit and Label the contours.
-
Select File/3D Data/Create 3D DEM or Grid to create the 3D file. R2V supports the standard USGS DEM format and the ASCII grid file format.
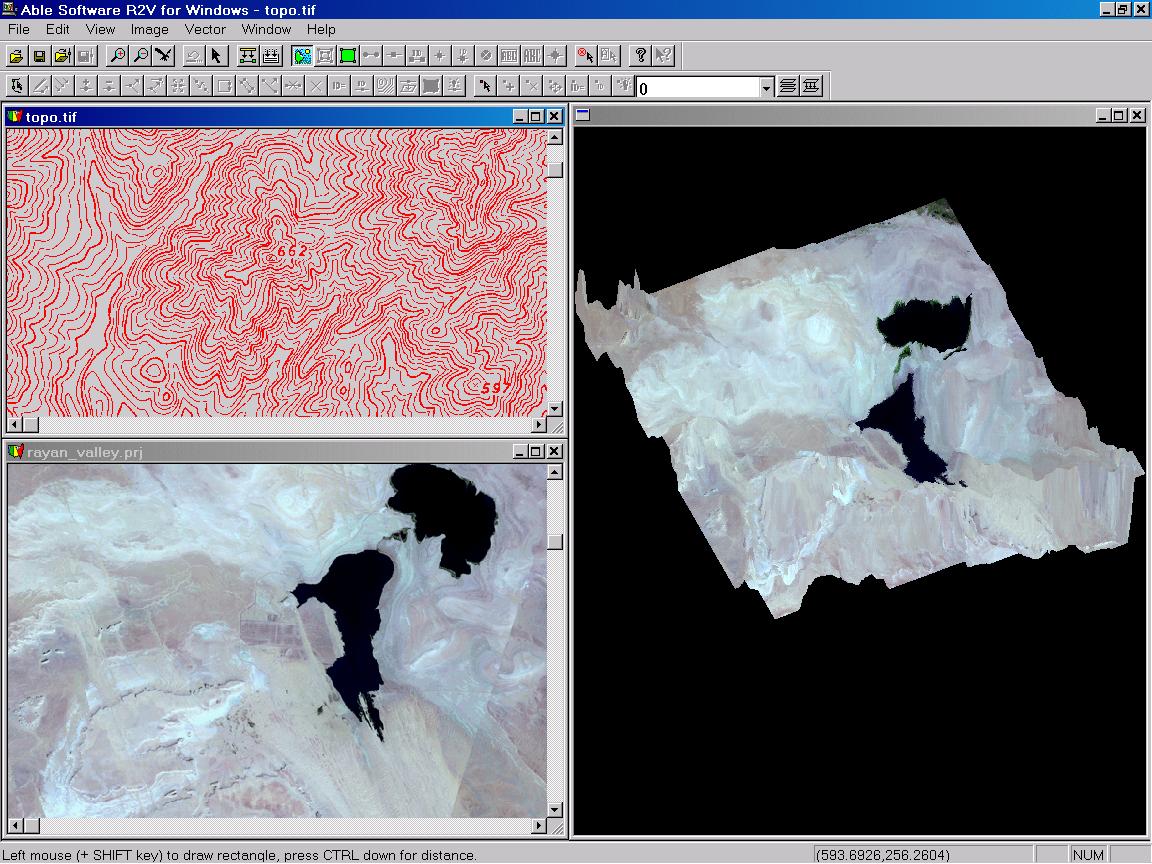
Drape An Image to 3D Surface
Open the 3D DEM or Grid file to display in R2V
Open the image (any image, including a map, aerial photo, or satellite image) you want to drape on the 3D surface.
You can use Image/Crop Region to select the proper image region to cover the 3D surface.
Choose File/3D Data/Image Drape to display the image on the 3D surface. You can then change the view angle and perform an animation (See example).
Export 3D Model
Export 3D to AutoCAD DXF
Export to VRML for visualization over the Internet. Simply download a VRML plug-in for your web browser and then click here to see an example.
Export to STL file to create 3D physical model using a rapid prototyping machine. Click here to see some examples.
Export to XYZ Formats